
YouTube’s built-in thumbnail A/B testing feature — called “Test & Compare” — gives creators a data-driven way to find which thumbnail actually gets more clicks. In 2026, this feature is widely available to creators with monetized channels and even some non-monetized channels. This guide covers exactly how youtube thumbnail ab testing works, how to set up a test, what to measure, and how to apply the results.
Key Takeaways
- YouTube’s “Test & Compare” feature lets you test up to 3 thumbnail versions against each other on real viewers
- The test and compare youtube feature is available in YouTube Studio under Content > Details
- YouTube automatically serves each thumbnail variant to a portion of your audience and tracks CTR (click-through rate)
- Run each test for at least 3-7 days to get statistically meaningful data
- youtube thumbnail experiment data should drive your future thumbnail design decisions, not aesthetic preferences
What Is YouTube Thumbnail A/B Testing?
A/B testing (also called split testing) means showing different versions of a thumbnail to different groups of viewers and measuring which version gets more clicks. Instead of guessing which thumbnail design works better, you get real data from your actual audience.
YouTube built this capability natively into Studio because they recognized that thumbnail decisions were one of the most impactful levers creators have. As the YouTube blog has noted, a thumbnail change can shift CTR by 30-100% on the same video.
How YouTube’s Test & Compare Feature Works
YouTube’s Test & Compare divides your video’s impressions among the thumbnail variants you create:
- With 2 thumbnails: ~50% of impressions go to each
- With 3 thumbnails: ~33% each
YouTube tracks how many viewers click each variant (CTR) and may also track watch time to determine if one thumbnail attracts more engaged viewers.
The test runs until YouTube determines a winner with statistical confidence, or until you manually end it and choose a winner.
How to Set Up a Thumbnail A/B Test in YouTube Studio
- Log in to YouTube Studio.
- Go to Content in the left sidebar.
- Click on the video you want to test.
- In the Details tab, find the Thumbnail section.
- You’ll see a Test thumbnails button or a + icon next to your current thumbnail.
- Click Test thumbnails.
- Upload 1-2 additional thumbnail variants (up to 3 total).
- Click Test to start.
The test begins immediately. YouTube begins routing a portion of your impressions to each variant.
Monitoring Your thumbnail split test
To check test results:
- Go to YouTube Studio > Content.
- Find the video under test — it will show a “Test in progress” indicator.
- Click on the video and navigate to the analytics or thumbnail section to see current CTR per variant.
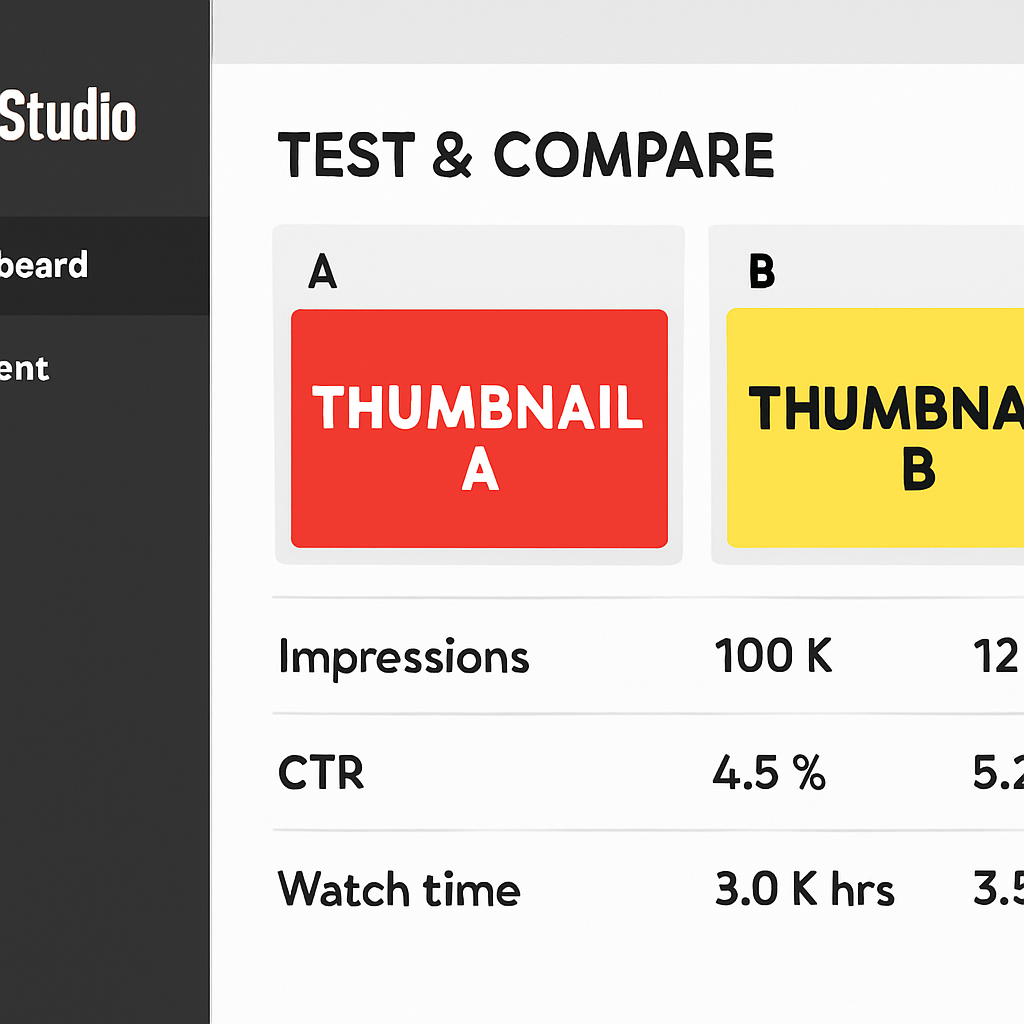
Metrics to track:
- Impressions CTR: The percentage of people who clicked after seeing the thumbnail
- Watch time per click: Some thumbnails attract clicks but worse viewer retention (viewers feel misled)
How Long Should You Run a Test?
The minimum meaningful test duration depends on how many impressions your video receives per day:
| Daily Impressions | Minimum Test Duration |
|---|---|
| Under 500/day | 7+ days |
| 500-2,000/day | 4-7 days |
| 2,000-10,000/day | 3-5 days |
| Over 10,000/day | 2-3 days |
Running a test for less than 2-3 days can give misleading results due to day-of-week traffic variations. Weekday vs weekend traffic often behaves differently.
What to Test
The most impactful variables to test in a youtube thumbnail experiment:
1. With face vs without face: Does your audience respond better to a person in the thumbnail or a product/scene shot?
2. Text vs no text: Some audiences scan text first, others respond to visuals.
3. Different emotional expressions: The same person with different expressions (surprised vs excited vs concerned).
4. Color scheme: Bright/light vs dark/moody backgrounds.
5. Different compositions: Subject centered vs left-aligned with text right, etc.
6. Text content: Two different 3-5 word phrases that hint at different angles of the video’s value.
Making the Most of A/B Test Results
When your test concludes:
- Select the winner in YouTube Studio to set it as the permanent thumbnail.
- Record what you learned: What design element drove the difference? Log it for future thumbnails.
- Apply the insight broadly: If “surprised face + yellow background” beat “neutral face + blue background,” apply those elements to your next 5-10 thumbnails and see if the pattern holds.
- Don’t overgeneralize: A result from one video type may not apply to others. Test consistently.
Using Test Data to Build Your Thumbnail System
Over time, A/B test data becomes your most valuable thumbnail design resource. After running 10-20 tests, patterns emerge:
- Does your audience prefer text or no text?
- Which color combinations drive higher CTR?
- Do face thumbnails outperform object thumbnails in your niche?
This data-driven design approach is what separates creators with 3-4% CTR from those with 6-10% CTR on similar content.
When Test & Compare Isn’t Available
If you don’t see the Test & Compare option in YouTube Studio, it may be because:
- Your channel doesn’t yet have access (it’s still rolling out)
- Your video hasn’t accumulated enough impressions yet
- You’re accessing Studio from a mobile device (desktop works more reliably)
As a fallback, you can manually A/B test by changing your thumbnail every 7 days and tracking CTR in YouTube Analytics > Content > See More, filtering by video.
Conclusion
YouTube thumbnail ab testing is the most reliable way to improve your CTR in 2026 beyond guesswork. Use YouTube’s built-in Test & Compare feature, run tests for at least 3-7 days, and let real viewer data dictate your design decisions. For the design principles behind high-CTR thumbnails, see How to Make YouTube Thumbnails That Get Clicks.
For background design guidance that can inform your test variants, see YouTube Thumbnail Background Ideas.